Jump into your first WARDOGS match and you’ll see it immediately: a wall of players sprinting straight at the Control Zone the second it appears.
Most of them will die in seconds, burn through their starting cash, and respawn to do it again.
WARDOGS launched into Early Access on September 10, 2026, and the players who understand how the Control Zone actually scores are going to have a massive head start over everyone else zerging the hill.
For the full breakdown of the map and mode itself, see our Control Zone guide.
Table of Contents
- The Zerg Rush Problem
- How Control Zone Scoring Actually Works
- Towers and the Hot Zone: What They Actually Reward
- The Case for Playing the Zone from the Outside
- Building an FOB Beats Squatting on a Rooftop
- Reviving Beats Respawning
- Why Three Teams Change the Math
- Reading the Score: When to Push, When to Hold
- A First-Match Game Plan
- Common Mistakes New Players Make
- Key Takeaways
- Frequently Asked Questions
The Zerg Rush Problem
Here’s what happens in almost every beginner lobby. The Control Zone spawns, and a hundred players converge on the same 2x2 km patch of ground.
It’s chaotic, it’s loud, and for most of the people running in, it’s a losing trade.
You buy a loadout. You sprint into the open.
You get maybe a few seconds of actual objective time before three teams’ worth of gunfire ends your life.
You respawn, buy another loadout, and repeat. Each cycle costs cash and earns little back.
The fix isn’t to avoid the Control Zone. It’s to understand what’s actually being scored before you commit to it.
How Control Zone Scoring Actually Works
WARDOGS splits up to 100 players across three teams: Valkyra, Lonestar, and Manticore.
According to the official WARDOGS Steam page, the mode takes inspiration from King of the Hill.
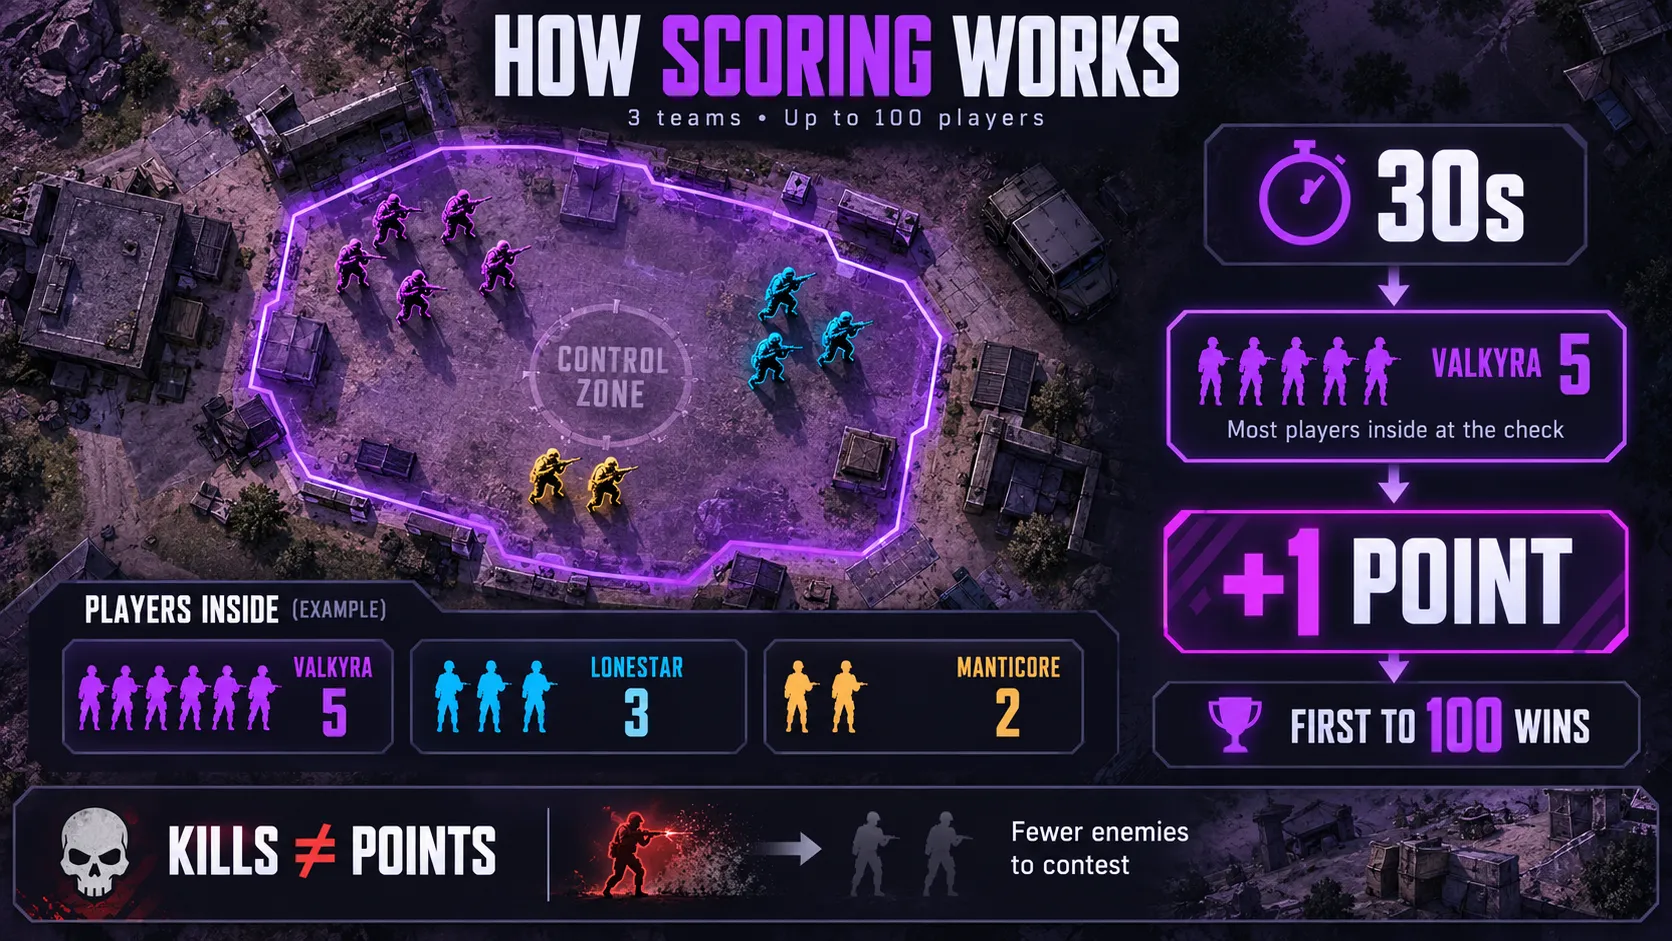
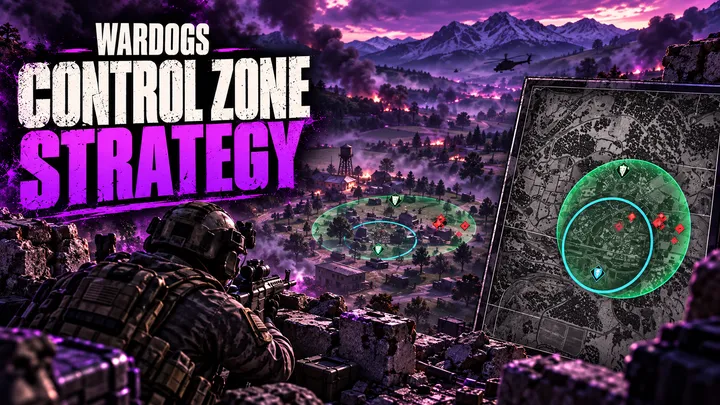
Three teams fight over a randomized 2x2 km Control Zone inside a much larger map, and the team with the most players inside it earns points. First to 100 wins.
The detail that matters most, and the one a lot of early strategy talk glosses over: scoring runs on a timer, not on kills.
Bulkhead’s official FAQ confirms it directly. In a pinned Steam Community post from Bulkhead/Team17 developer G_Medlin, the studio states: every 30 seconds, the game checks team presence and awards one point to whichever team has the most players inside the zone at that moment.
That means eliminations don’t put points on the board by themselves. A kill only helps your score indirectly, by removing a body from an enemy team’s count.
Your own team still needs living players standing inside the zone when that 30-second check happens.
Keep that distinction in mind, because it changes how you should think about any strategy built around fighting from a distance.
Towers and the Hot Zone: What They Actually Reward
Scattered inside the Control Zone are Towers: capture points with terminals attached.
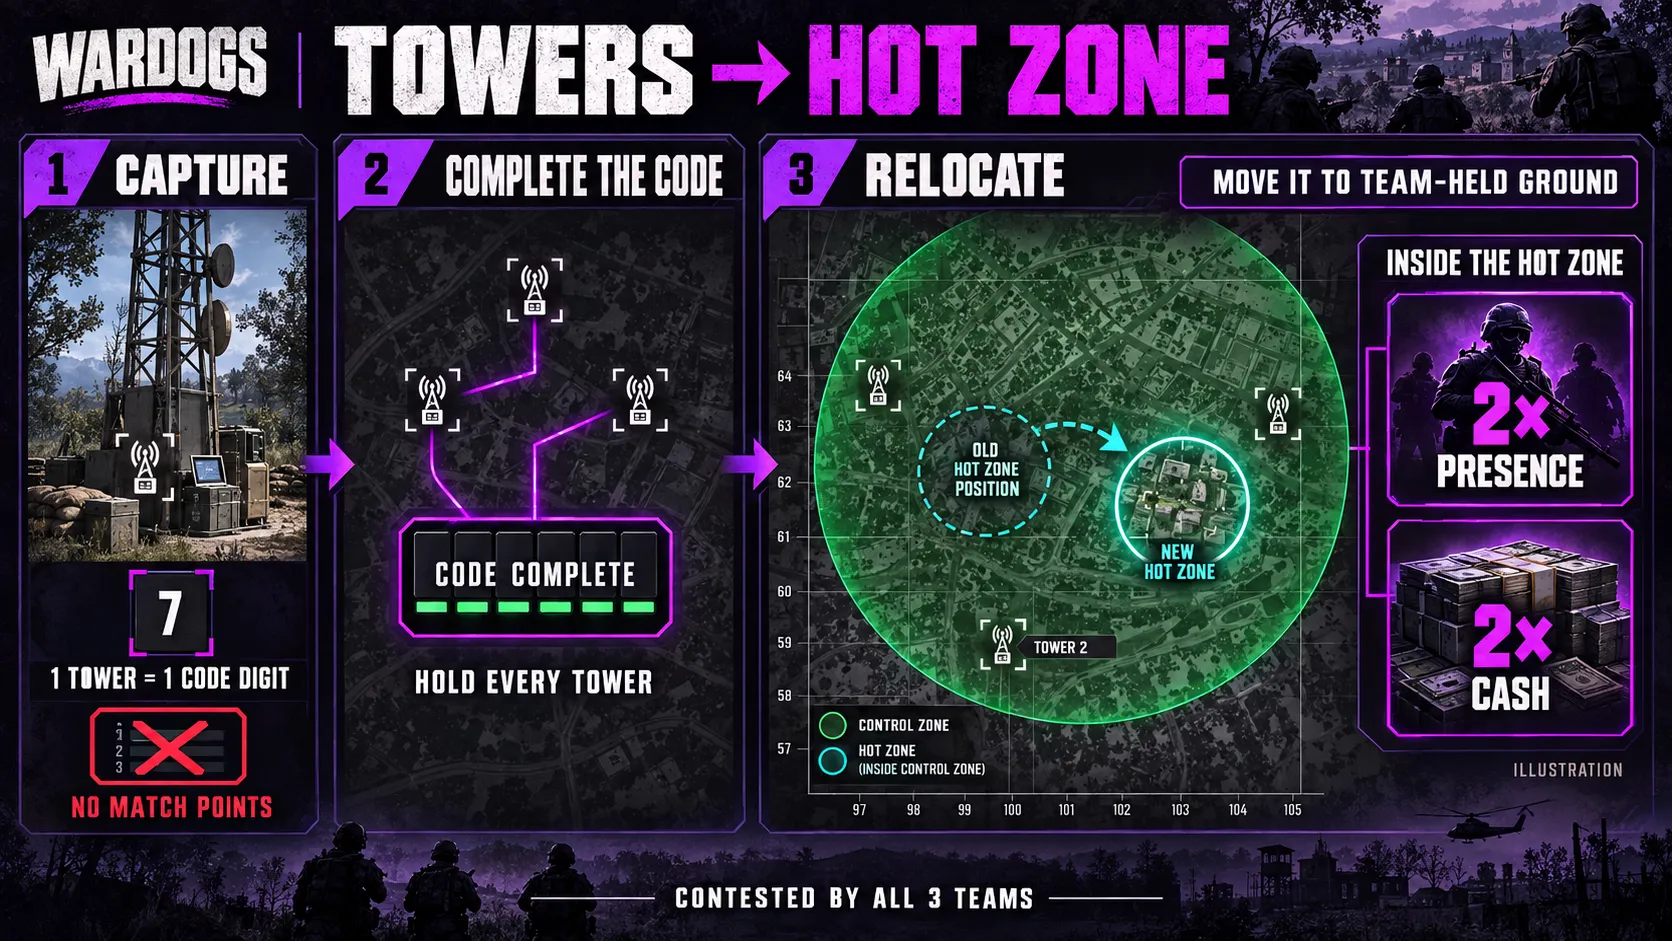
It’s worth being precise here, because this is a common point of confusion. Capturing a Tower does not add to your match score. What it gives you is one digit of a code.
Hold every Tower on the map, assemble the full code, and your team can redirect the Hot Zone, a smaller, moving sub-area inside the Control Zone, to a location of your choosing.
Standing in the Hot Zone counts double toward your team’s presence score and pays double cash.
Pulling it onto ground your team already controls is one of the highest-value plays available once you’re coordinating with a full squad.
Towers are also contested by all three teams at once, since they sit inside the same zone everyone’s already fighting over.
Treat them as a secondary objective on the way to the Hot Zone payoff, not a shortcut to winning the match outright.
The Case for Playing the Zone from the Outside
One WARDOGS strategy creator built an entire approach around skipping the scramble: instead of fighting for presence inside the zone, treat the Control Zone as a killbox you command from the outside.
The creator’s pitch is “zone denial” rather than “zone presence.”
Your goal isn’t to stand in the circle, it’s to make it too costly for the other two teams to stand there either, by holding the high ground, ridge, or tower that overlooks it and picking off anyone who tries to enter.
The creator frames this as two combined pillars:
- Positional dominance: controlling the best vantage point before anyone else claims it
- Economic warfare: farming kills from safety while opponents who rush the zone bleed cash on gear they lose in seconds
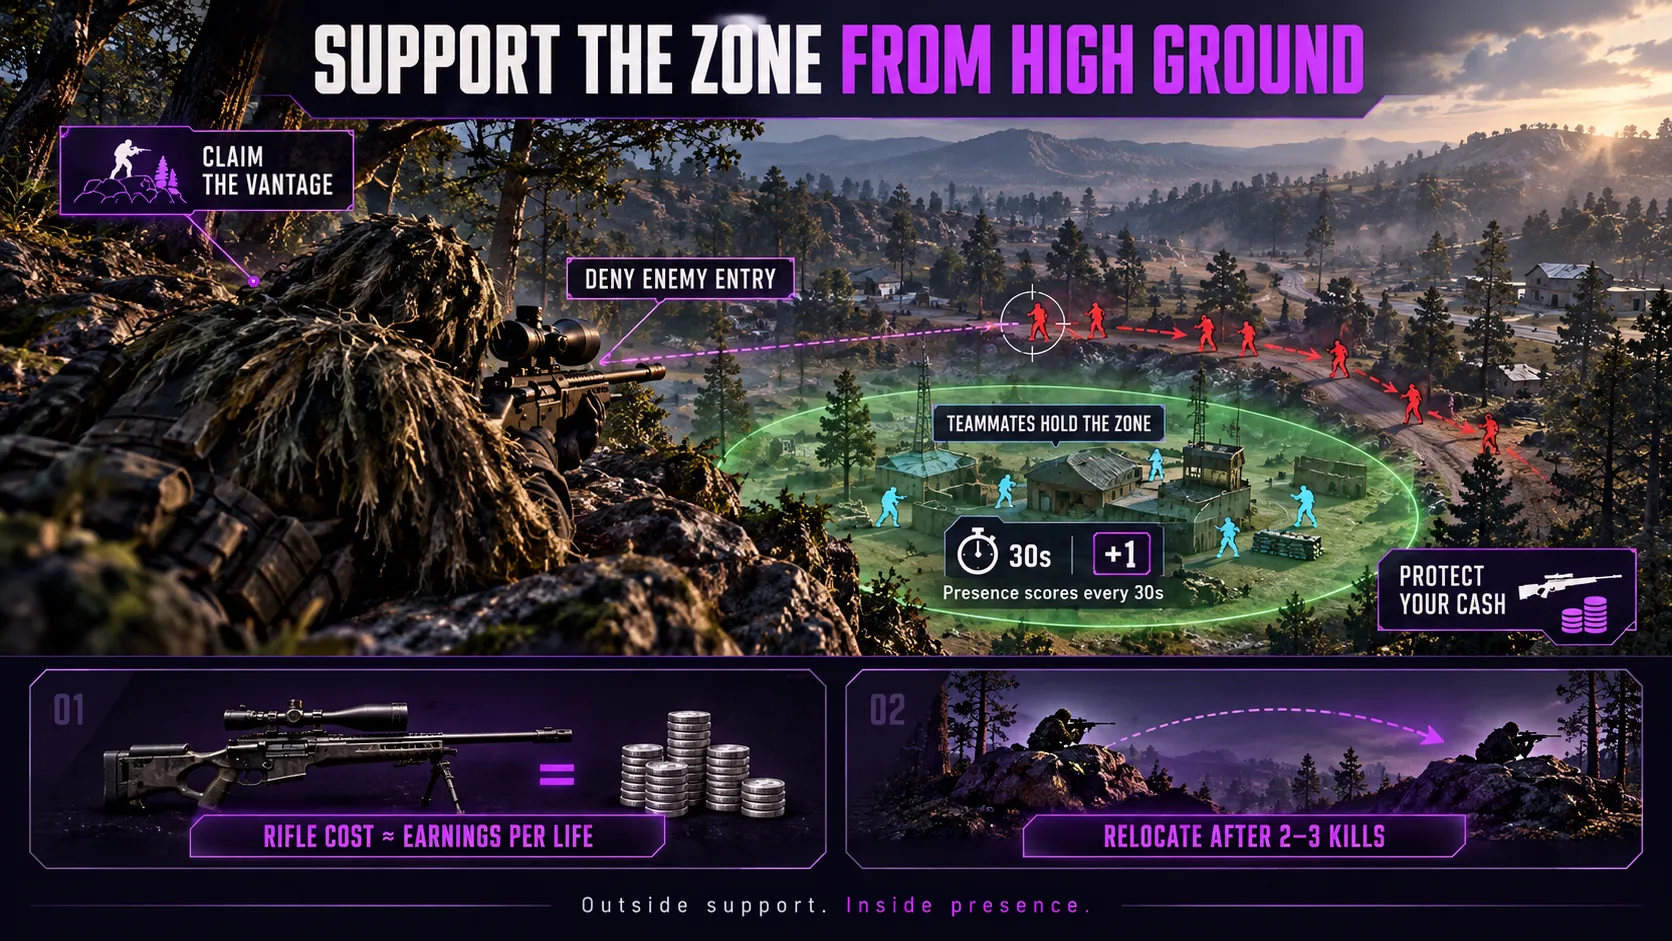
Purchasing a ghillie suit and sniping from distance is listed right alongside chasing the Hot Zone, ferrying supplies by helicopter, and building a fortified base as equally valid approaches. This is a real, developer-endorsed playstyle, not a gimmick invented for a video.
Community sniping guides tend to frame the loadout side of this as a ladder rather than a single purchase.
Community guides reportedly walk through a rifle ladder from a cheap entry-level scout rifle up through mid-tier bolt-actions to an anti-materiel rifle that can also threaten light vehicles.
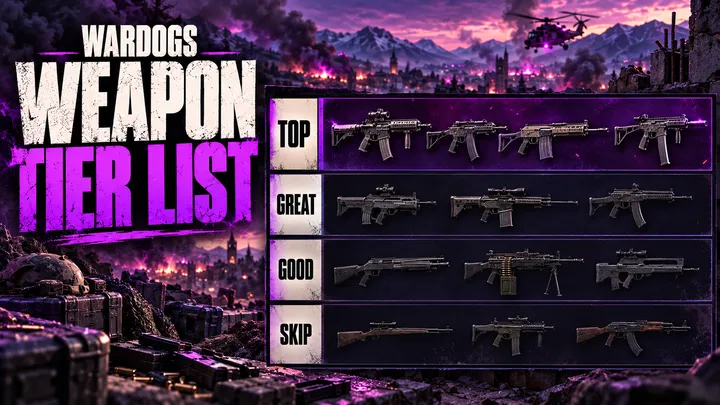
The suggested rule of thumb: your rifle should cost roughly what your average life earns back, which is easier to judge with the full weapons tier list open beside you.
Treat specific prices as one community guide’s snapshot rather than fixed values, since Early Access balance patches can move them.
The underlying logic holds regardless: don’t sink your entire war chest into a rifle you’re not yet surviving long enough to use.
The same guide also makes a point worth repeating: relocate after two or three kills.
A spotted sniper in a destructible-cover game is a mortar target waiting to happen, and a position that made you money in minute five can get you killed in minute six if you camp it too long.
But it’s a support role, not a substitute for the win condition.
Because scoring is based on living presence inside the zone every 30 seconds, a squad that spends the whole match sniping from a ridge and never sends bodies into the zone will suppress enemies without ever putting a point on their own board.
The value of holding a power position is that it makes it safer for your teammates to hold the zone, not that it replaces the need for someone to be standing in it.
Building an FOB Beats Squatting on a Rooftop
Finding a good natural vantage point works early in a match, but WARDOGS gives you a stronger version of the same idea: build one yourself.
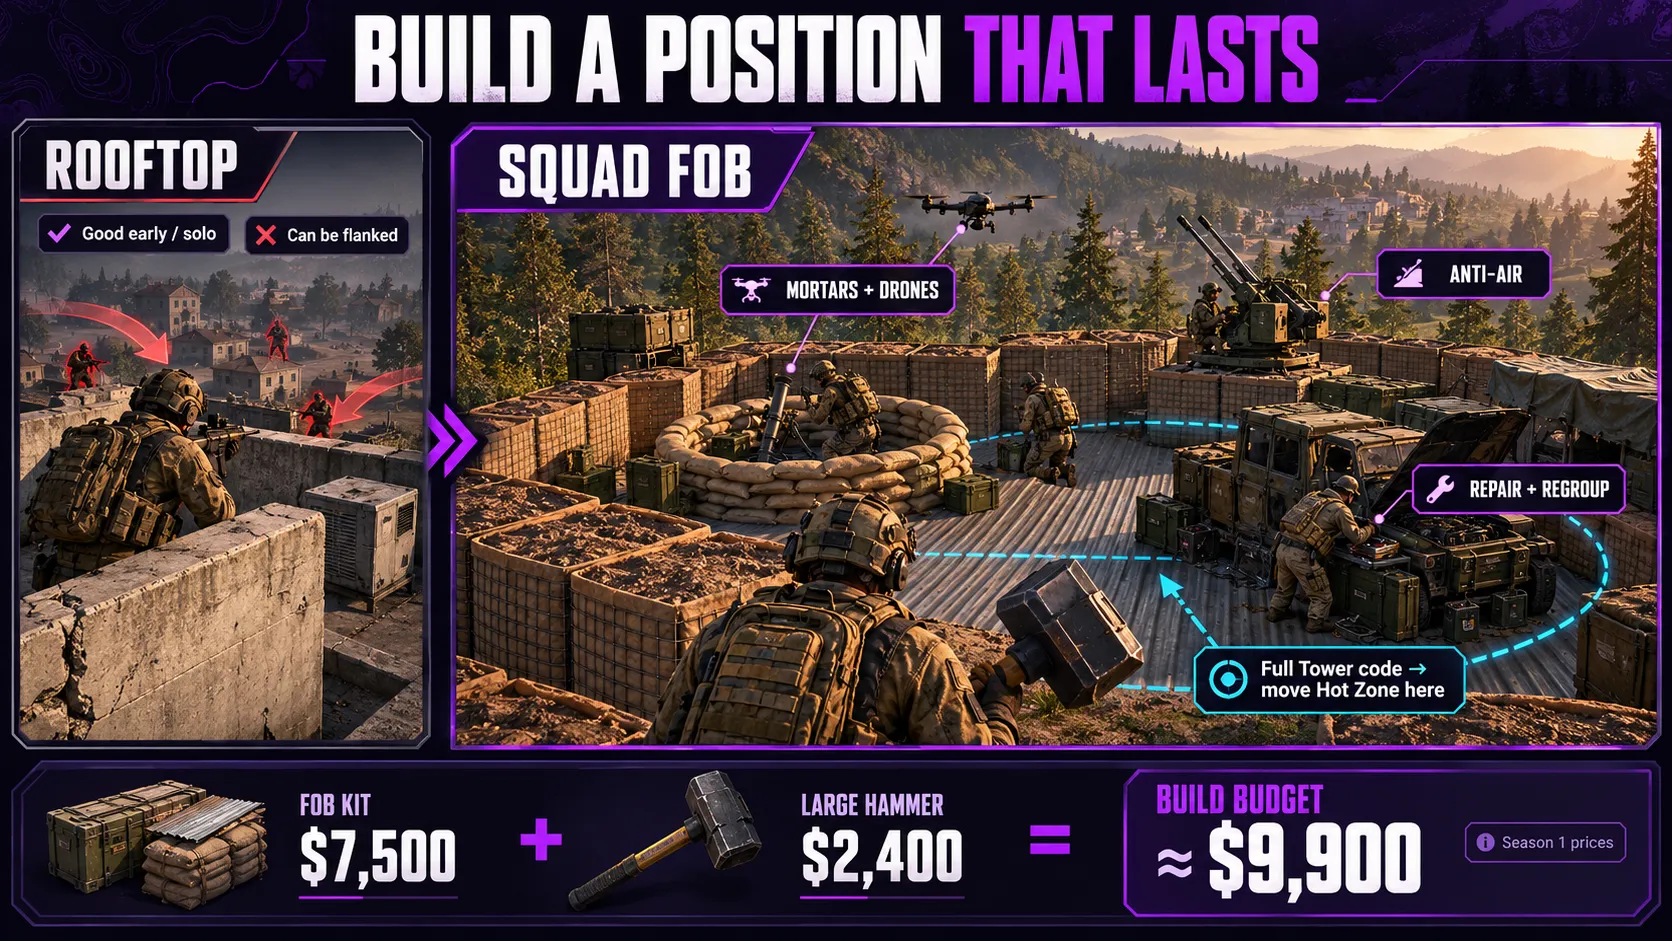
A Forward Operating Base can host mortars, anti-air emplacements, and drones, repair damaged vehicles, and create a defensible safe zone your team can fall back to.
The advantage over an existing rooftop or tower is durability. A natural high-ground position can be flanked, grenaded, or contested by another team with the same idea.
A properly built FOB can be repaired, defended with anti-air to shut down helicopter drops into the zone, and, if your team has assembled the full Tower code, used to pull the Hot Zone directly onto your own fortified position.
If you’re playing solo or without voice coordination, camping a natural vantage point is still a reasonable opening move.
If you’re in a squad, working toward an FOB is the stronger long-term play.
Per Bulkhead’s Season 1 patch notes, the base FOB kit now runs $7,500, and roughly $9,900 once you add the Large Hammer needed to build it out.
Budget accordingly before committing to this plan.
Community guides also describe a Drill attachment that runs on fuel supplies rather than a battery, reportedly around 1,200 fuel to activate and up to 6,000 fuel for a full cycle, and can pull the Hot Zone toward a developed FOB.
Separately, community sources report that any team reaching 20 points unlocks a forward spawn vehicle near the Control Zone, with the per-player cooldown reported anywhere from several minutes to roughly 10 depending on the source.
Both are unconfirmed pre-release specifics rather than official documentation, so see our towers and Hot Zone guide for the fuller mechanics and the latest numbers.
Reviving Beats Respawning
WARDOGS lets teammates revive a downed player directly.
Community guides also report that every player gets one free single-use emergency resuscitator per life, for a faster self-service option.
Either way, a revive puts a body back into the fight without anyone making the long trip back from the safe zone.
That matters more in Control Zone play than in most shooters, because your own respawn costs you real time on a 256 km² map.
Every 30-second scoring check that passes while you’re traveling is a check your team is a body down for.
A revived teammate is back on the objective in seconds. A respawned one might be minutes out, depending on how far your safe zone sits from the fight and whether a vehicle is available.
Treat revives as objective play in their own right, not just a courtesy to a downed friend.
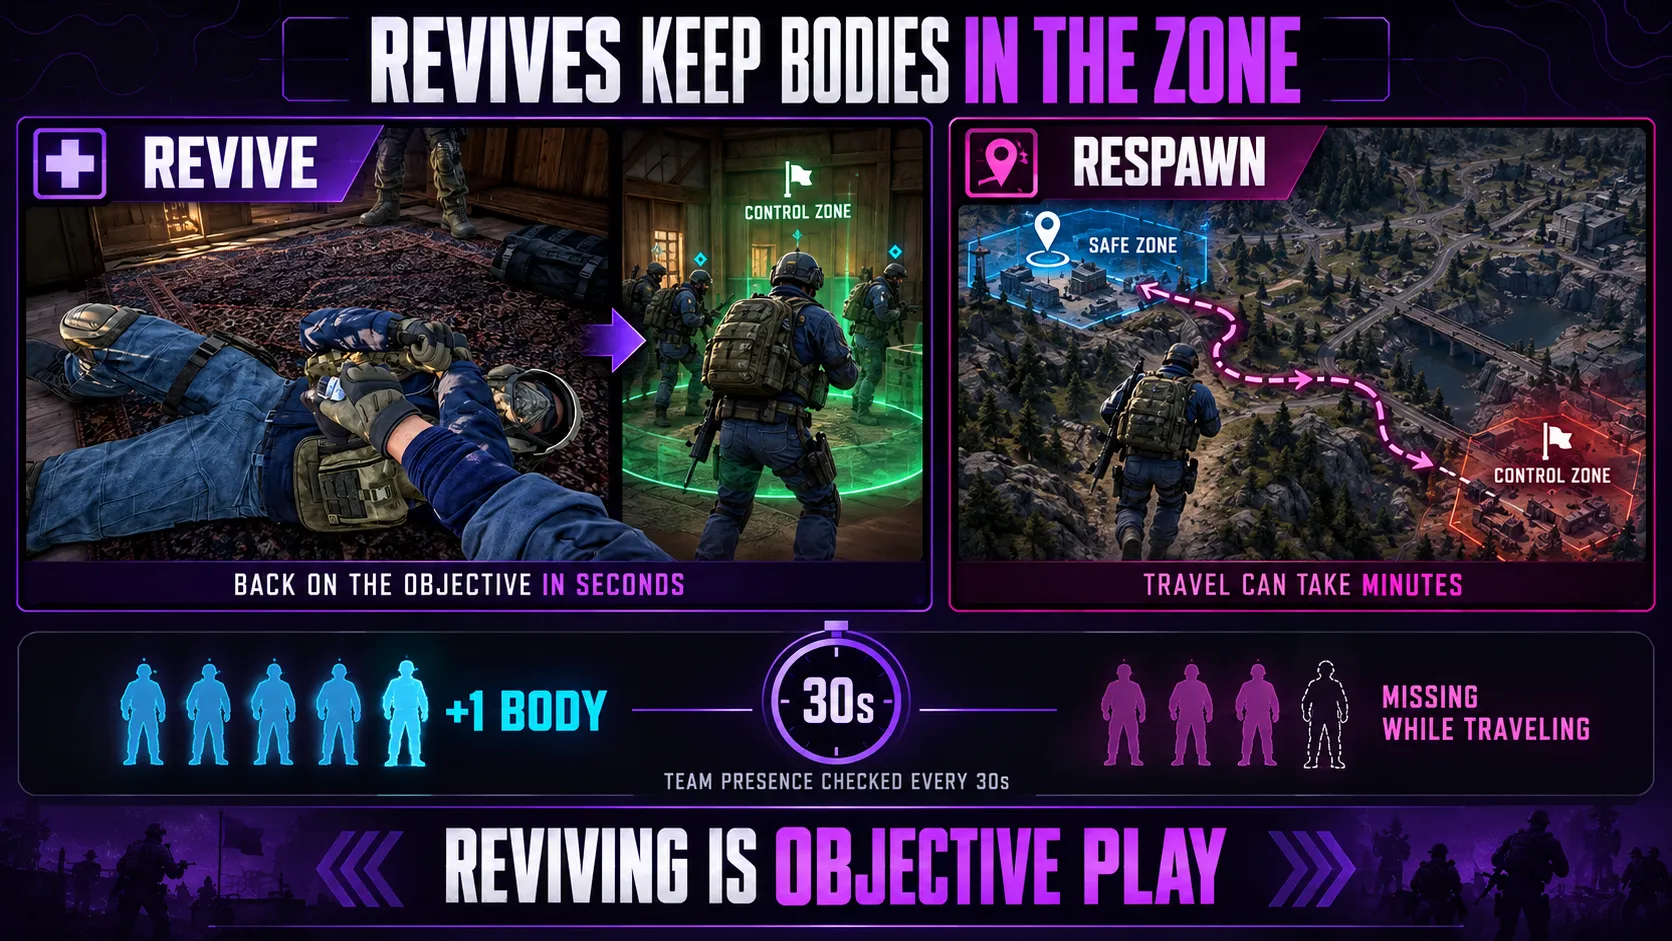
The specific bleed-out window before a downed player is lost for good isn’t nailed down in public sources yet, so don’t bank on a long grace period, but the strategic point stands regardless of the exact timer.
Why Three Teams Change the Math
Two-team shooters have a simple rule: hurt the other side, help yourself. WARDOGS doesn’t work that way.
With three teams converging on one Control Zone, wearing down a rival can just as easily hand the win to whichever team stayed out of that fight.
The zone-denial creator’s endgame advice leans directly into this: don’t run through the front door during your final push.
Wait for the sound of a big fight breaking out between the other two teams, then arrive as the third party once they’ve both spent resources on each other.
You’re not trying to win a fair fight, you’re trying to walk into an already-decided one and take the spoils.
The same logic runs the other way, too. Committing your whole team to grind down a strong second-place team while a quiet third team farms the zone unopposed is exactly the trap this dynamic sets for the unwary.
Before committing to any extended fight, it’s worth asking who benefits if this fight runs long, because in a three-team match, the answer is often not you.
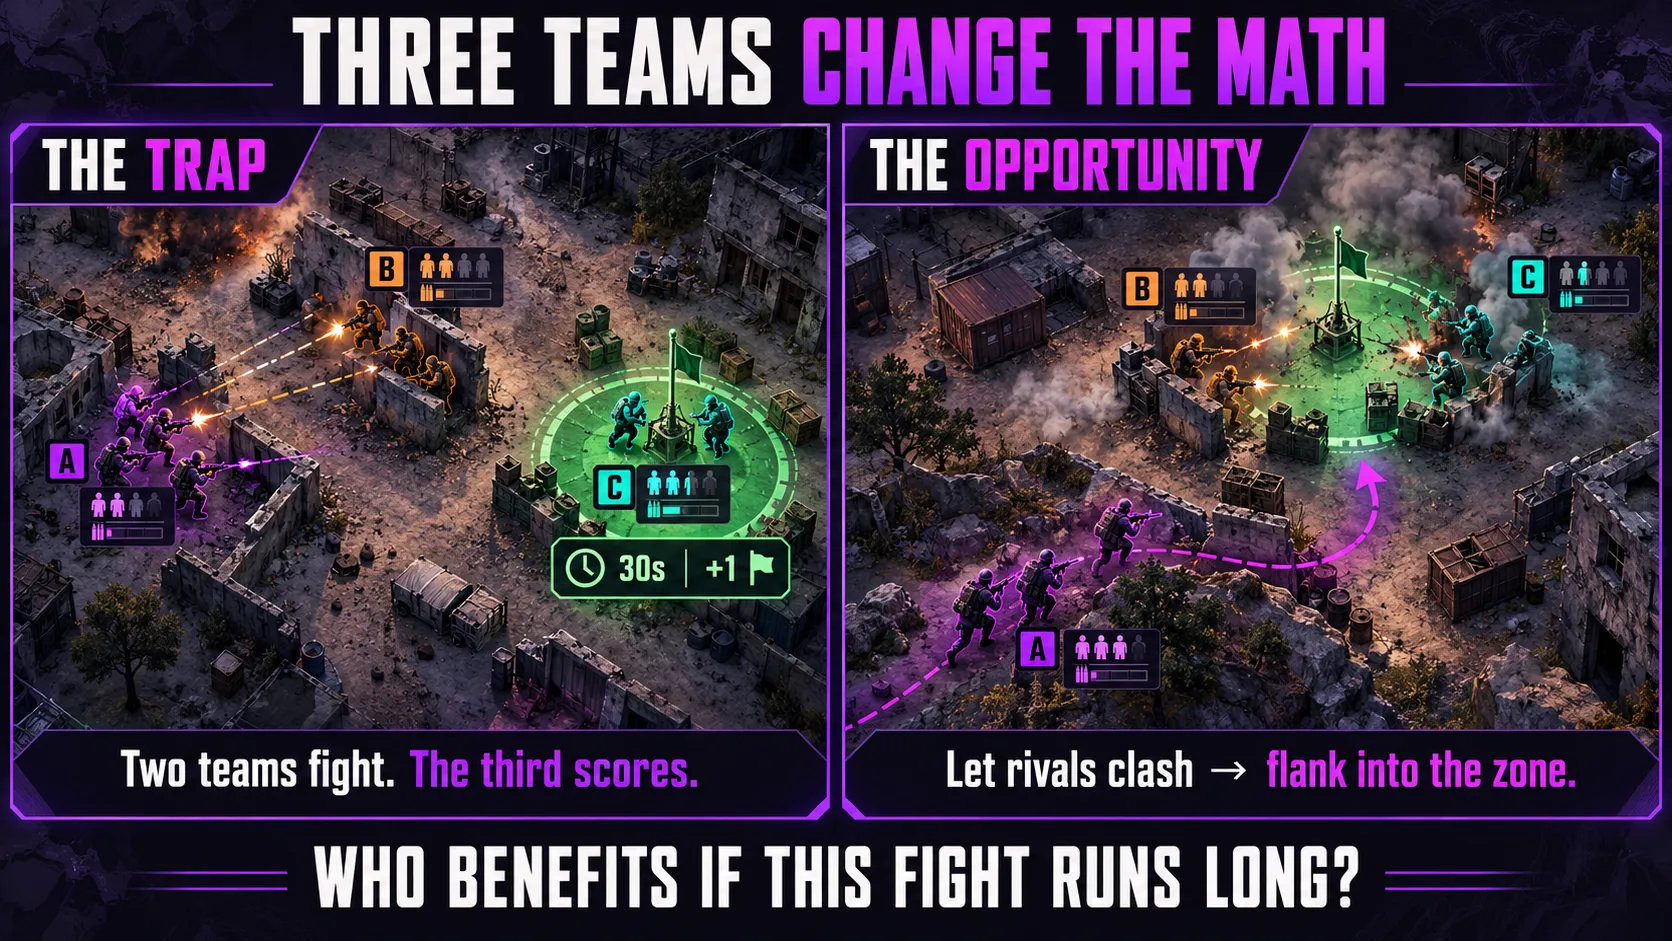
Reading the Score: When to Push, When to Hold
A perfect defensive position loses its value the moment the fight moves somewhere else, and in WARDOGS the fight moves constantly.
The Control Zone relocates between matches, and the Hot Zone shifts inside it throughout a single match.
Turtling a great vantage point after the action has rotated away just means you’re farming an empty map while your team goes down a body.
Use the scoreboard as your read on this, not just your gut.
If your team already holds the scoring lead, the safer play is often to hold what you have and let the other two teams spend resources contesting it, rather than pushing aggressively into a fight you don’t need to win.
If you’re behind, that calculus flips: passive overwatch stops being enough, and you need more living bodies actually inside the zone when the next 30-second check happens.
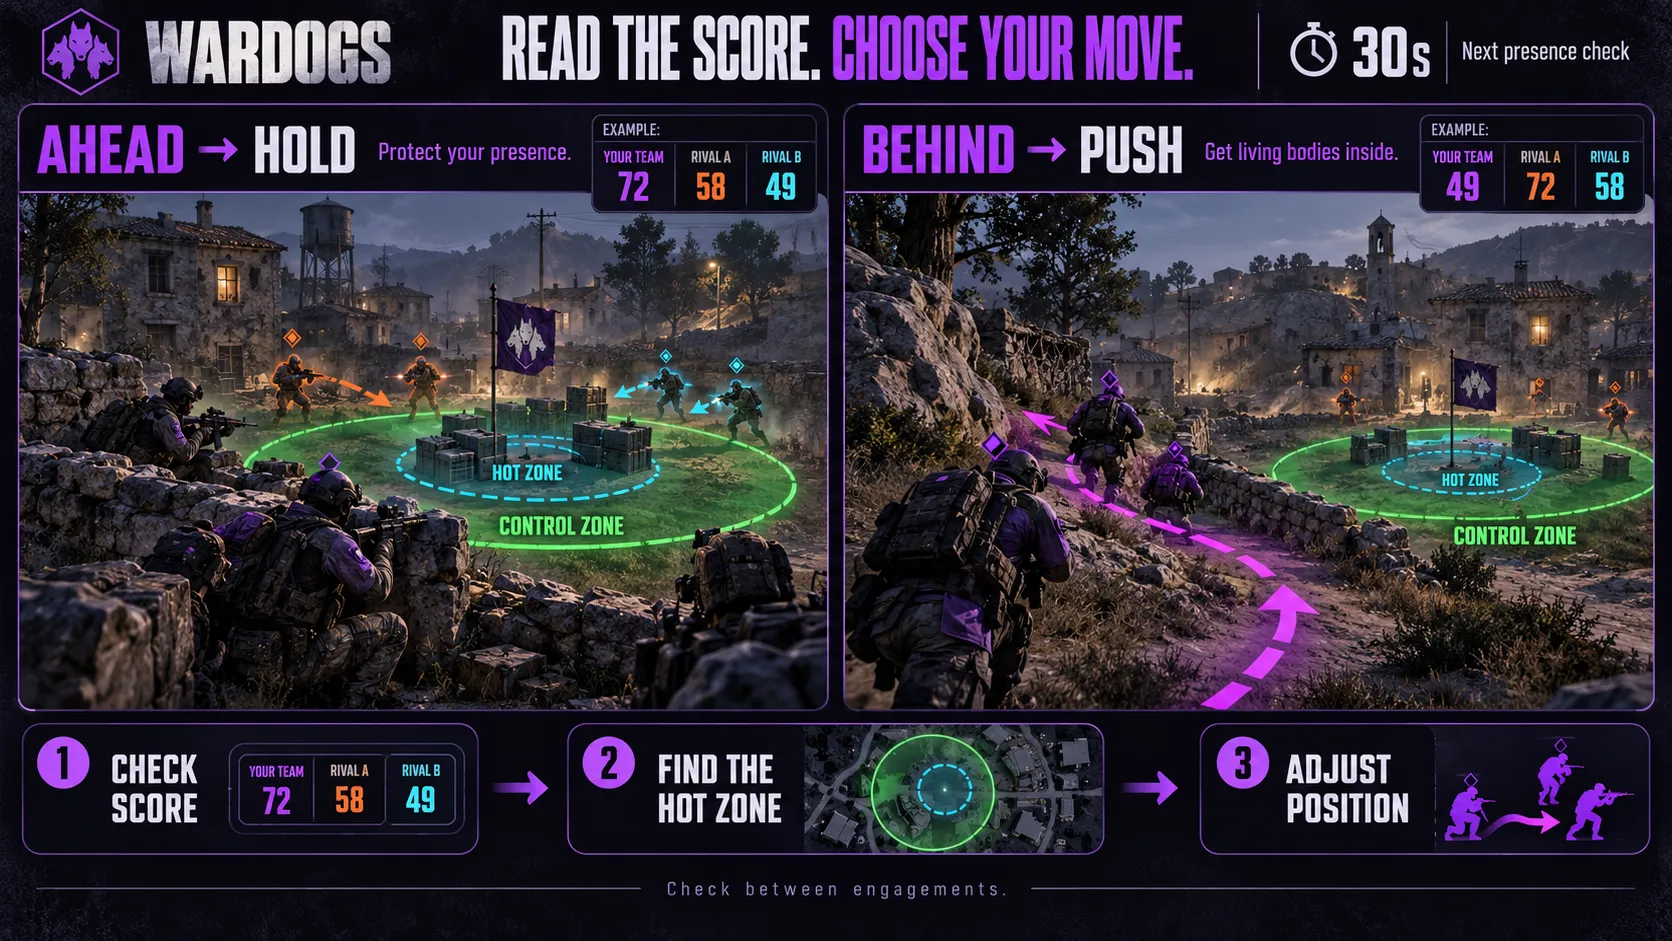
Checking the score between engagements, not just at the start and end of a match, is what tells you which mode you should be in.
A First-Match Game Plan
The zone-denial creator lays this whole approach out as a three-phase blueprint, and it’s worth following close to as given, since it maps cleanly onto how a WARDOGS match actually unfolds.
Phase one, the opening gambit (first three minutes).
When the map loads and the Control Zone is marked, ignore it at first. Open your map and identify two or three positions with height and cover that overlook the zone without sitting inside it.
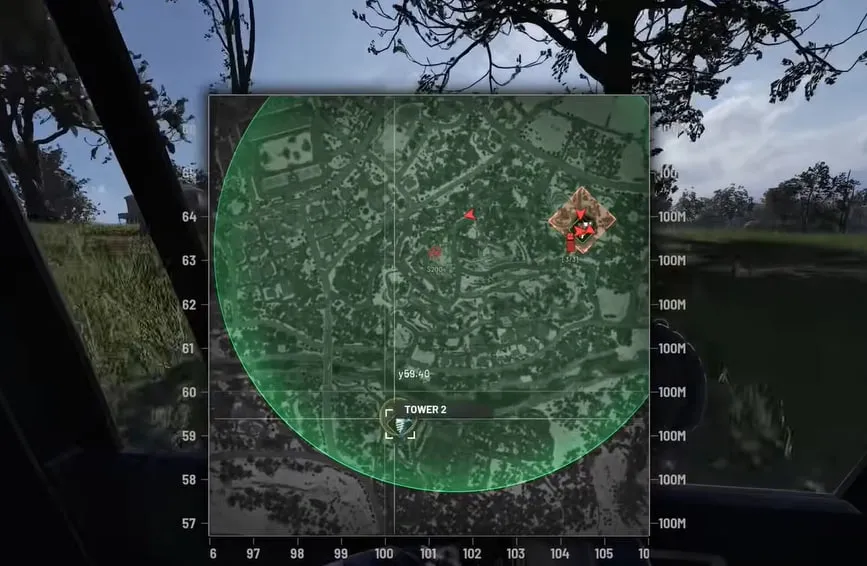
Pick one, deploy there directly, and don’t get pulled into the crowd fighting for the zone’s center. Expect to have to fight one or two other players with the same idea for that spot, but that’s a far better fight than the 30-plus-player brawl happening below.
Secure a serviceable mid-to-long-range weapon and get eyes on the objective.
Phase two, the harvest (roughly minutes three to ten).
This is where the strategy pays for itself. You’re the zone’s gatekeeper: anyone from the other two teams trying to enter, hold, or cross the objective is a target, and players standing still trying to hold ground inside the zone are easier marks than ones just passing through.
Reinvest kill money into your loadout as you go rather than sitting on cash. Watch for the Hot Zone appearing, since it pulls the most aggressive players toward a single predictable location and turns them into a concentrated source of income.
If you’re in a squad, use this window to work a Tower for its code digit as well.
Phase three, the decisive push (final minutes).
Eventually your team needs bodies inside the zone to actually close out points, and that’s the moment to cash in everything you’ve farmed. Buy the strongest loadout you can afford, and go in with the intel your overwatch time bought you.
You know which buildings are occupied, where enemies like to hold, and how the fight has been flowing. Don’t walk through the obvious entrance. Flank.
Where possible, use the three-team dynamic covered above to your advantage by timing your push for when the other two teams have already worn each other down.
Common Mistakes New Players Make
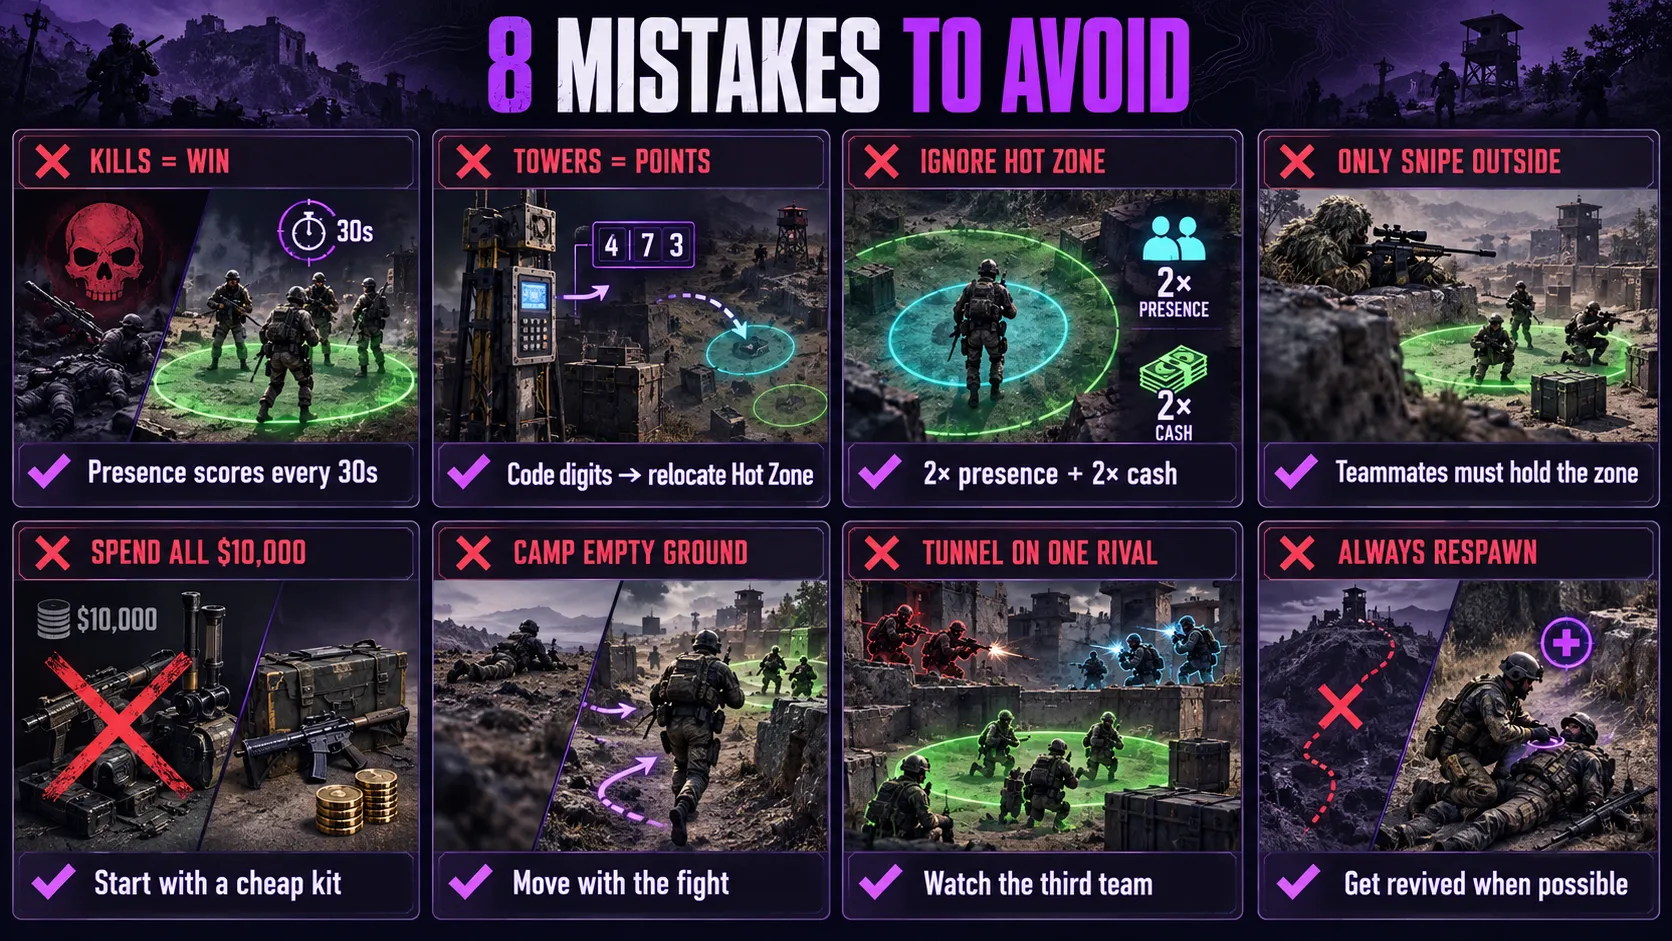
- Treating kills as the win condition. They’re not. Presence inside the zone every 30 seconds is what scores points.
- Assuming Towers add match score. They don’t. They hand over code digits toward relocating the Hot Zone.
- Ignoring the Hot Zone. Standing in it counts double for scoring and pays double cash. It’s worth chasing, not avoiding.
- Never actually entering the zone. A team that only snipes from outside can suppress enemies all match and still lose if nobody on the team is standing inside when the score ticks.
- Spending your full starting cash on your very first loadout. You start with $10,000, and losing it on a life that dies in ten seconds sets you back fast. Keep your opening loadout cheap until you understand the flow of the match.
- Turtling a great position after the fight has moved on. A perfect vantage point overlooking an empty patch of ground isn’t doing your team any good.
- Grinding down a strong rival while a quiet third team farms the zone. In a three-team match, the fight you win isn’t always the one that decides the match.
- Sprinting back to the fight after every death instead of getting revived. A revive costs seconds. A full respawn trip across a 256 km² map can cost the match a scoring tick or several.
Key Takeaways
- Scoring checks team presence inside the Control Zone every 30 seconds. First team to 100 points wins.
- Kills matter indirectly, by removing enemies from the count, not by adding points directly.
- Towers hand over code digits, not match points. Collect every digit to redirect the Hot Zone.
- The Hot Zone counts double for scoring and cash, and moves throughout the match.
- Sniping from a fortified position is an officially supported playstyle, but it supports your team’s win, it doesn’t replace the need for players inside the zone.
- Building an FOB is a stronger long-term version of camping a natural vantage point, and can pull the Hot Zone toward it once developed.
- Revives put a body back on the objective far faster than a full respawn trip does.
- With three teams in play, letting two rivals fight each other to exhaustion and taking the zone after is often stronger than joining the fight yourself.
- Read the scoreboard mid-match, not just at the end. It tells you whether to hold your position or commit.
- Start with a cheap loadout. Your $10,000 doesn’t refill automatically after a bad life.
Frequently Asked Questions
Is it worth setting up on high ground instead of rushing the Control Zone?
Yes, especially early in a match. A position overlooking the zone gives you visibility, safer engagements, and a steady source of cash, without exposing you to the crowded fight in the center. Just remember it’s a support role: your team still needs living players inside the zone when the score ticks.
How do you avoid going broke in your first few WARDOGS matches?
Keep your opening loadout cheap. Dying repeatedly on expensive gear before you understand the flow of a match is the fastest way to drain your starting cash. Build up a cash cushion through kills and teamplay actions before buying your best equipment.
When should you commit to entering the Control Zone instead of holding a perch?
Once you’ve built up cash and a read on the fight, usually in the mid-to-late match. Watching from a power position tells you where enemies cluster and which routes are exposed, so you can commit with a stronger loadout and better information than a player who rushed in from the start.
Is a Forward Operating Base better than just camping a rooftop?
Generally, yes, for a coordinated squad. A rooftop or natural high ground can be flanked or contested by another team with the same idea. An FOB can be repaired, defended with anti-air, and used to pull the Hot Zone toward it once your team holds every Tower, making it a more durable version of the same positional idea.
Do WARDOGS Towers give match points?
No. Capturing a Tower does not add to your team’s score. It hands over one digit of a code. Collect every digit by holding every Tower, and your team can redirect the Hot Zone to a location of its choosing. Match points still only come from bodies inside the Control Zone.
How much starting cash do you get in WARDOGS?
Every player starts with $10,000. That cash pays for your loadout each life, carries over between lives, and persists from match to match. You add to it by getting kills, reviving teammates, transporting allies, and holding objectives.
Can you win WARDOGS by sniping from outside the Control Zone?
Sniping from a fortified position is an officially supported playstyle, and it’s a strong way to build cash and thin out enemy numbers before they reach the zone. But match points only come from your team’s presence inside the zone, so a pure sniping approach supports a win, it doesn’t replace the need for teammates actually standing on the objective.
What is a WARDOGS FOB and why does it matter for Control Zone strategy?
A Forward Operating Base is a player-built structure that can host mortars, anti-air emplacements, and drones, repair vehicles, and create a fortified safe zone near the fight. Unlike simply occupying an existing rooftop, an FOB is defensible, repairable, and can be used to pull the Hot Zone toward it once your team holds every Tower.
Should I rush into the Control Zone at the start of a WARDOGS match?
Not immediately. Sprinting into the middle of a 100-player, 3-team fight with a starting loadout is usually a losing trade: you spend cash on gear, die fast, and earn little in return. Securing a position that overlooks the zone first, then committing once you understand the fight, is generally the safer opening.
What happens when you die in WARDOGS?
You respawn at your team’s safe zone with no forced countdown timer, according to Bulkhead’s August devlog as relayed by community sources, but getting back to the fight still costs time, whether on foot, by ground vehicle, or by helicopter. Every death also costs you the cash you spent on that life’s loadout, so dying repeatedly without earning it back can put you in a financial hole.