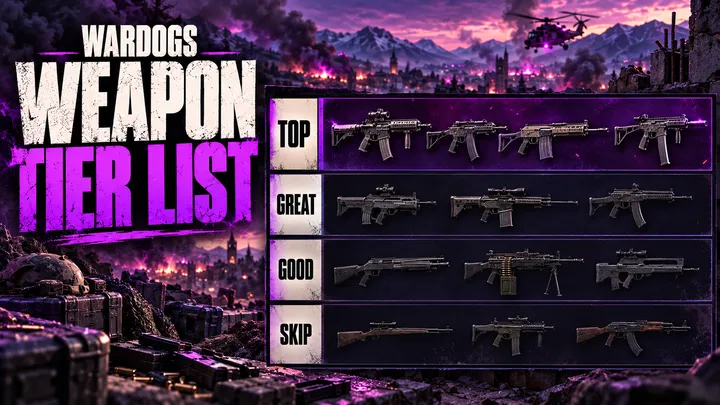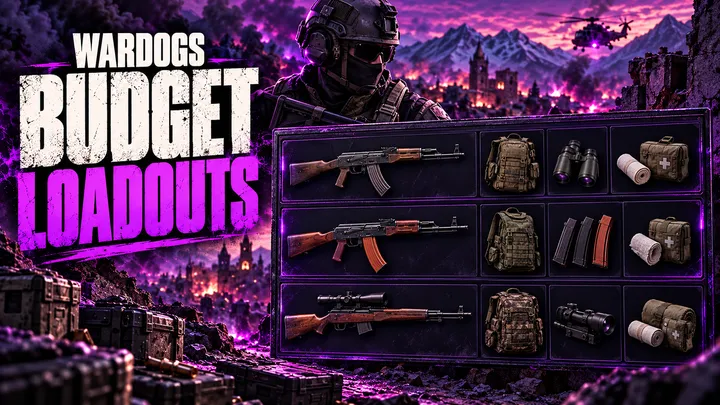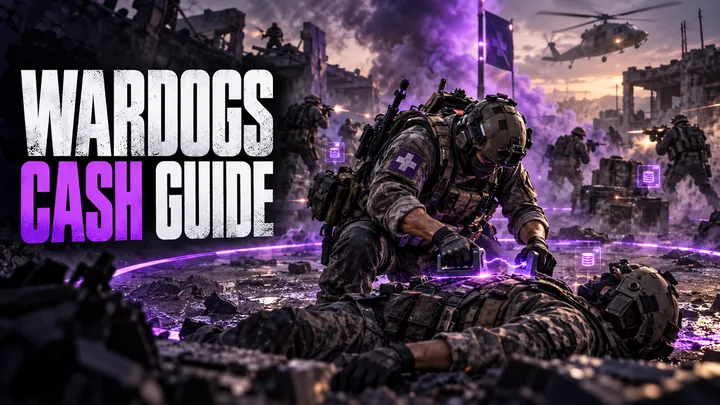
Every life in Wardogs starts with a purchase, so a few bad deaths can drain a starting $10,000 balance fast.
The best approach is to pick a role that earns back more than its loadout costs.
Early testing through the alpha and beta ranked the main money-making methods for the early game.
Here is what pays, what it costs, and what changed in Season 1.
Quick answer: The best early-game way to make money in Wardogs is playing Medic inside the Hot Zone, which pays double cash for revives, heals, and kills.
Helicopter piloting and FOB building come next.
Tanks earn the most, but Season 1 moved them well out of early-game reach.
Table of Contents
- How Cash Works in Wardogs
- Best Ways to Make Money in Wardogs, Ranked for the Early Game
- Play the Hot Zone: Everything Pays Double
- Do Kills Make Money in Wardogs?
- 1. Medic in the Hot Zone (Best Early-Game Earner)
- 2. Helicopter Pilot (Best Second Pick)
- 3. FOB Builder (Safest Steady Income)
- 4. Recon: Spotting and Long-Range Sniping
- 5. Anti-Vehicle Support
- 6. Driver (Consistent but Slow)
- Tanks: The Highest Ceiling, Now Harder to Reach
- What Season 1 Changed About Your Money Plan
- How to Choose Your Method and Protect Your Profit
- Key Takeaways
- FAQ
How Cash Works in Wardogs
Every player starts with $10,000, buys a loadout for each life, and earns cash for teamplay actions like reviving squadmates, transporting friendlies, and controlling the objective.
Cash carries over from match to match, according to Team17’s official Wardogs page.
The goal is simple: earn more per life than the loadout costs.
Cash does three jobs: it unlocks new items, pays for each loadout, and converts into gold bars spent in the black market.
Nearly everything a player does earns something, so there is no single required playstyle for turning a profit.
Wardogs is in Early Access, and Bulkhead said the beta economy would change for launch, as PC Gamer noted in its money guide.
The Season 1 changelog then adjusted more than a dozen prices.
Every payout below comes from pre-launch testing unless a note says Season 1.
Best Ways to Make Money in Wardogs, Ranked for the Early Game
Medic in the Hot Zone ranks first for the early game, followed by piloting, FOB building, recon, anti-vehicle play, and driving.
Tanks sit in their own category because they need progression most players will not have for a while.
| Rank | Method | What you need | Main catch |
|---|---|---|---|
| 1 | Medic in the Hot Zone | Defibrillator, first aid kits, a large group | Needs teammates getting hurt near you |
| 2 | Helicopter pilot | A helicopter and flying practice | Crashes cost money, enemy anti-air |
| 3 | FOB builder | Large Hammer, supplies, spotters | Pays only with spotters and ammo supply |
| 4 | Recon | Binoculars or spotting scope, later a Mosin | Slow start until better gear unlocks |
| 5 | Anti-vehicle | RPG or another launcher, large backpack | Pays only if the enemy runs vehicles |
| 6 | Driver | A vehicle, ideally a supply truck | Slow and exposed to ambushes |
| Own category | Tanks | A tank and a second player | Steep unlocks, RPG counters |
Play the Hot Zone: Everything Pays Double
The Hot Zone pays double cash for everything done inside it, including kills, drop-offs, heals, revives, and spotting.
Team17 lists chasing the Hot Zone as a way to earn double cash.
It is the biggest multiplier in the game, so every method below is worth running inside it whenever the risk allows.
In early testing, a defibrillator revive paid $1,200 outside the Hot Zone and $2,400 inside it.
Standing in the zone also pays, which matters during downtime.
When no enemy players are around, zone presence is the only cash coming in, so waiting outside for a fight to start costs money.
The Control Zone strategy guide covers how the zone moves and where to hold.
Do Kills Make Money in Wardogs?
Yes.
Killing players on other teams pays cash with any weapon and any class, so kills make a solid baseline.
Kills should not be the only income source, though.
Carry one extra tool that pays between firefights: a spotting scope, C4 or remote explosives, or revive items.
In the gaps between fights, those tools allow quick teammate revives, spotting enemy helicopters, FOBs, and players, or blowing up vehicles and fortifications.
A kill-only kit leaves money on the table, because downtime otherwise pays nothing beyond zone presence.
1. Medic in the Hot Zone (Best Early-Game Earner)
Medic is the best early-game earner in Wardogs because revives and heals pay well and the Hot Zone doubles both.
It only works in a group.
A medic running alone with one teammate has nobody to patch up, so sticking with as many people as possible matters.
In one content creator’s testing, a defibrillator medic in a large squad cleared $250,000 to $320,000 in a single match and averaged about $80,000 per life.
The best single life recorded was $148,000, all in the Hot Zone.
The classes and roles explainer breaks down the full Medic progression.
Here is what each revive paid in that testing:
| Revive type | Outside the Hot Zone | Inside the Hot Zone | Health restored |
|---|---|---|---|
| Standard revive (no item) | $800 | $1,600 | 10 |
| Resuscitator | $900 | $1,800 | 10 |
| Defibrillator | $1,200 | $2,400 | 35 |
The defibrillator pays the most and works faster, and it brings players back at 35 health instead of 10.
It costs $1,600 to equip, plus batteries.
Small batteries cost $150 and give four revives each, while large batteries cost $300 and give ten.
Two defibrillator revives outside the Hot Zone already cover the $1,600 equip cost.
Healing pays too.
A bandage heal earned about $400 in that testing, and an individual first aid kit (IFAK) paid around $1,440 or more, depending on how low the teammate’s health was.
Self-healing pays nothing, so it is worth avoiding when possible, though sometimes it is unavoidable.
PC Gamer’s beta testing reported $900 per revive and $200 per bandage heal, so exact figures moved between builds and heal payouts should be treated as a range.
Revived and healed players also tip the medic, and assist cash comes in when they go on to get kills, heal others, or destroy vehicles.
Early-Game Medic Setup
Until the defibrillator unlocks, bring as many bandages and resuscitators as the backpack holds.
When those run out, ask a downed teammate if it’s okay to use the resuscitator they are carrying.
Most players agree, since they want back in the fight quickly.
Once a defibrillator is unlocked, drop the resuscitators and carry only the free emergency one as a backup.
The defibrillator unlocks at Medic level 11, according to PC Gamer’s beta testing.
Season 1 slowed that climb: the official changelog raised the XP needed for level 10 from 25,000 to 35,000 and for level 20 from 111,500 to 250,000.
A solid early medic kit:
- Level 2 armor and helmet
- An AK assault rifle or an SMG, two magazines, and a stack of ammo
- The defibrillator with two large batteries
- Two stacks of smoke grenades
- One stack of bandages and two to four stacks of IFAKs, depending on the backpack
Stay around medium weight.
After every encounter, check the enemies killed and restock medical items, ammo, and armor.
An SMG saves weight for more medical items, but few players ran SMGs during the alpha and beta, so ammo pickups ran dry.
Heli crates from teammates fixed that and allowed running any weapon.
2. Helicopter Pilot (Best Second Pick)
Piloting pays for every drop-off, for a short survival window after the drop, and for every kill or action passengers complete afterward.
It ranks second because early matches have few pilots, and players are still learning the game and respawning often.
Light enemy anti-air is also typical in the first days.
If the helipad is empty, load supplies instead of waiting for passengers.
Building and ammo supplies for FOBs earn cash when someone loads them into the FOB, and assist cash comes in when mortars and SAM sites at that FOB score kills.
Ammo, medical items, and armor can also be dropped to players fighting in the Hot Zone, with an upcharge set on the crate contents.
Cash comes in when someone pulls an item out, and again when they heal or get a kill with what was supplied.
The tips and tricks guide covers flight controls and routes.
A Little Bird with machine guns or rockets is a faster way to earn while piloting, since it kills players and vehicles directly.
Even then, picking up anyone waiting at base or loading supplies costs little time and adds income.
Two honest caveats from that testing: piloting alone rarely produced large sums for that creator, though plenty of other players earned a lot by delivering players and supplies or hunting other helicopters.
Helicopters can also be expensive for a new player, so learning to fly in the firing range, where every vehicle in the game can be operated risk-free, beats crashing in a live match.
For the kit, a parachute and repair tool alone work, or a cheap gun, one magazine, a stack of ammo, and bandages.
A pilot’s helicopter often does not stay airborne long, so the cheap kit is the safer default.
Skip flying in two situations.
If the team already has many pilots transporting players, supplying FOBs, and hunting helicopters, profits drop.
If the enemy team is heavy on anti-air and blocks the zone, coordinating with the team to remove the anti-air FOB or the launcher players comes first.
Season 1 update: the changelog cut the Z20 Lakota’s Pilot-track price from $50,000 to $35,000 and doubled the Little Bird with miniguns from $25,000 to $50,000.
3. FOB Builder (Safest Steady Income)
FOB building is a lower-risk earner that pays slower than medic or piloting.
The approach: build the base from the ground up, then operate the emplacements inside it, mainly mortars and anti-air such as the Sea Whiz and SAM.
In some matches, building a FOB at the start and staying in it until the end earned over $200,000 while spending only on one basic kit.
That kit was level 1 armor, the free resuscitator, a stack of bandages, a hammer, and a shotgun with a stack of ammo.
The FOB guide walks through the build order.
The catch is that a FOB pays only when other roles support it:
- Anti-air pays once the enemy flies helicopters, which is close to guaranteed. With practice on SAM timing, helicopters come out of the sky easily.
- Mortars need spotters. Without someone marking targets, blind fire lands a few kills at best, which is not worth the effort.
- Supply matters for both. If nobody keeps the FOB stocked with ammo, neither emplacement runs for long.
If eight players are on mortars with nobody supplying and nobody spotting, it is not worth building.
Location matters.
Many players build at the towers, which works because towers pull the zone toward them.
The strongest FOBs sit away from the towers, where enemies have to search for them, yet within mortar range of the towers in major conflict areas.
That keeps mortars in reach and lets anti-air catch helicopters dropping off players and supplies.
Heavily fortified FOBs benefit from a drill and oil supply, which lets the Hot Zone be called to that position.
Always build inside the zone.
A FOB outside it does not count toward controlling the zone, cannot reach many areas with its mortars, and pays very little for anything done there.
Season 1 update: Two changes hit FOB builders.
The Large Hammer now unlocks at Support level 8 instead of 7, and its unlock price rose from $25,000 to $75,000.
Vendor prices also jumped: the FOB kit went from $2,500 to $7,500 and the Large Hammer from $1,600 to $2,400, per the official changelog.
That is $9,900 for the pair, nearly the entire $10,000 starting balance, which is why Bulkhead made it more of a choice.
A FOB is now closer to a squad purchase than a solo one.
4. Recon: Spotting and Long-Range Sniping
Recon pays in two ways.
Long-range kills pay more the farther away the target is, and spotting is passive income: cash comes in for marking an enemy and again when that marked target dies, no matter which team kills it.
The weapons tier list covers the best recon rifles and optics.
Recon is also one of the cheapest ways to earn.
Most testing built a recon kit for under $10,000.
Binoculars cost $75 in the beta, according to PC Gamer, so a spotting-only kit costs very little.
Until better rifles unlock, skip the starting sniper.
It is weak enough that most players get frustrated, so carrying another weapon and focusing on spotting works better early.
Once the Mosin unlocks, recon starts snowballing.
Every sniper from the Mosin onward is effective, and a long-range variable zoom scope with a suppressor can kill almost anything with low-level or no armor.
Gear upgrades that matter most:
- Spotting scopes with zoom: swap off the binoculars as soon as possible.
- Rangefinder: shows distance to a target, which makes shots easier to line up.
- AP ammo: needed later in the season as players move to level 3 and 4 armor.
- Ghillie suit: blends into foliage, and victims get only a general direction on their kill cam.
Setting up overlooking enemy towers and FOBs allows spotting players, emplacements, helicopters, and vehicles as they enter the zone.
If a mortar team works from those marks, they rack up cash the entire match.
Season 1 update: The 6-10x scopes cost more now.
The MRAD went from $25,000 to $40,000 and the MOA from $30,000 to $45,000.
5. Anti-Vehicle Support
Destroying vehicles pays large sums, and more when the vehicle carries several people, but this kit only earns if the enemy is running vehicles.
It is worth bringing only when plenty are on the road.
The RPG-7 launcher guide lists the launchers and mines by unlock level.
It ranks fifth early because few vehicles drive deep into the zone and the RPG has to unlock first.
C4 can kill vehicles, but landing it on a moving target is hard, so stationary vehicles and the spawn vehicle are the realistic targets.
Another option is sneaking behind an enemy FOB and destroying supply vehicles before they roll inside.
Where the shot lands matters.
Most vehicles die to a single rocket wherever it lands, but tanks and spawn vehicles need smarter shots:
- Front: does little damage.
- Sides and rear: the rear is the best spot.
- Sides near the tracks: blows the tracks, leaving the vehicle immobile and able to move only in a circle.
- Left side: almost guarantees a fuel tank hit, causing a leak that eventually immobilizes it.
Helicopters are riskier.
The free-fire launchers can hit them, but the miss rate is higher and misses waste money.
A dedicated anti-air launcher only pays if the team is not already shooting helicopters down, and with Sea Whiz, SAM, and attack helicopters around, it usually is.
Kit for anti-vehicle work:
- Large backpack, since each rocket takes three slots and three to four should be carried
- Level 2 helmet and armor
- A light assault rifle with one or two magazines and a stack of ammo
- Bandages
The weight makes movement slow, so coordinating with pilots for an insertion close to the target and out of the open matters.
Pilots or drivers can also drop a rocket crate instead of a walk back to base.
6. Driver (Consistent but Slow)
Driving is one of the slower methods but a consistent one, and it stays relatively safe until an enemy drops behind friendly lines and starts blowing up vehicles.
Income comes from delivering players and supplies, and again for what those players do and for kills at FOB emplacements that were supplied.
It earns the same way piloting does, only at a slower pace.
The Humvee guide compares it against the other ground vehicles.
Money speeds up once the URAL supply truck unlocks, which carries many passengers and pallets of supplies instead of small crates.
The Humvee, especially the one with a roof machine gun, is a strong pick for moving players around the Hot Zone.
Taking it to FOBs with the respawn vehicle, collecting newly spawned players, and driving them in works well.
One of the best driver jobs is taking the team’s respawn vehicle to the zone.
It is a long, slow drive, but it pays for delivering it, for each player who spawns on it, and for what they do after getting out.
The respawn vehicle appears once a team reaches 20 points, so the score is worth watching.
Parking it in a safe spot with cover, ideally at a FOB, keeps it alive and keeps players from dying the moment they step out.
Only supply FOBs on the near side of the zone.
A long drive slows income, and a FOB in the middle or in a contested area raises the chance of being shot out of the vehicle.
A cheap driving kit, since driving is the whole plan for that match:
- Repair tool
- Level 1 armor and helmet
- Shotgun or SMG with a stack of ammo
- Bandages and the free resuscitator
Buying a fuel can and keeping it in the vehicle helps.
Teams can build a refuel and repair station at a FOB, or pilots can drop fuel by crate.
If every FOB sits in a high-risk area, or the enemy keeps destroying vehicles, driving loses money and is worth avoiding.
Season 1 update: the URAL now unlocks at Driver level 3 instead of 4, and its price fell from $50,000 to $35,000.
Tanks: The Highest Ceiling, Now Harder to Reach
Tanks are one of the biggest earners in Wardogs, but they need two players and heavy upkeep.
One person drives, one operates the main gun, and both earn the same cash for every gunner kill.
The vehicle destruction guide covers tank crews and routes.
In testing, tank matches regularly cleared $270,000 or more.
A large part of that came from the alpha and beta, when few players carried RPGs to counter tanks.
By the last beta, more players ran RPGs when spotting a tank, and tanks are expected to be less dominant as the game matures.
They still take a lot to kill and remain a solid earner.
Buying in without a trusted partner, whether driving or manning the gun, is a mistake.
Expect upkeep: the tank needs fuel and ammo, and a pilot dropping shells and machine-gun ammo by crate when supplies run low helps.
A FOB refuel and repair station also matters.
The tank is slow, and a trip back to base each time it runs dry cuts income.
For loadout: level 1 armor in case stepping out to repair is needed, a repair tool, a gun with one extra magazine and a stack of ammo, bandages, and the free resuscitator.
When loading rounds, save one to three slots for a fuel can or an extra repair tool and battery.
Skip the tank if the team already fields several, if there is no reliable second player, or if the enemy is countering tanks hard.
Even against heavy counters, sitting back in a safe spot for long-range kills still works.
Season 1 update: Unlocking a tank in the first few days no longer makes anyone the richest player on the server.
The Heavy Tank moved from Career level 35 to Driver level 35, and the Artillery Tank moved from Career level 55 to level 90 with its unlock price rising from $400,000 to $500,000.
The slower Season 1 XP curve stretches those levels further: level 35 now needs 500,000 XP, up from 416,500.
What Season 1 Changed About Your Money Plan
Season 1 raised several prices and slowed progression, so early-game money plans matter more now than at launch.
The table lists the changes most likely to affect the methods above, taken from the official Season 1 changelog.
| Item | Before | Season 1 |
|---|---|---|
| FOB (vendor price) | $2,500 | $7,500 |
| Large Hammer (vendor price) | $1,600 | $2,400 |
| Large Hammer (Support unlock) | Level 7, $25,000 | Level 8, $75,000 |
| Heavy Tank | Career level 35 | Driver level 35 |
| Artillery Tank | Career level 55, $400,000 | Career level 90, $500,000 |
| 6-10x MRAD scope | $25,000 | $40,000 |
| 6-10x MOA scope | $30,000 | $45,000 |
| Z20 Lakota | $50,000 | $35,000 |
| URAL | $50,000, level 4 | $35,000, level 3 |
| Level 20 XP requirement | 111,500 | 250,000 |
The most recent patch checked, Patch 0.11 on September 14, focused on the server browser rather than the economy.
This guide will update when Bulkhead changes the economy again.
How to Choose Your Method and Protect Your Profit
Pick the method that fits the squad and the bankroll on hand, then keep the loadout cheap enough that a single death does not erase a good life.
- Squad nearby and cash tight: run Medic and build toward the defibrillator.
- Playing alone: run Recon spotting on a cheap kit, since it needs no squad.
- Few pilots on the team: fly, and fill empty seats or the cargo bay every trip.
- A squad with spotters and a supplier: build a FOB inside the zone.
- Enemy running lots of vehicles: carry anti-vehicle gear.
- A friend who can drive or shoot: consider a tank once the unlocks are affordable.
Whatever the pick, avoid overbuying.
Stay light, restock from enemy corpses after each fight, and ask teammates or pilots for supplies instead of walking back to base.
Communication matters too.
Wardogs is playable solo, but a group makes matches run smoothly, cuts down on deaths, and raises the odds of a revive instead of a full loadout repurchase.
Key Takeaways
- Medic in the Hot Zone ranks first: a defibrillator revive pays $1,200 outside it and $2,400 inside.
- Every method earns more inside the Hot Zone, which pays double cash.
- Piloting ranks second, especially when few teammates fly.
- A FOB pays only with spotters and a supplier, and now costs about $9,900 to deploy with a Large Hammer.
- Recon spotting is a cheap way to build passive income.
- Anti-vehicle gear pays off only in matches with many enemy vehicles.
- Tanks need a partner, and Season 1 pushed the unlocks far out.
- Cheap loadouts and corpse looting protect the bankroll.
FAQ
What is the fastest way to make money in Wardogs?
Playing Medic inside the Hot Zone was the fastest method in early-game testing.
A defibrillator revive paid $2,400 there, and a good squad kept the cash coming all match.
Helicopter piloting is the next best option, especially when few teammates fly.
How much money do you start with in Wardogs?
Every player starts with a one-time balance of $10,000.
Cash then carries over from match to match, and a new loadout gets purchased for every life, according to Team17.
That means one early death with an expensive kit can wipe most of a starting bankroll.
Does the Hot Zone give double cash in Wardogs?
Yes.
Everything done inside the Hot Zone pays double, including kills, revives, heals, spotting, and drop-offs.
In one round of testing, a defibrillator revive went from $1,200 outside the zone to $2,400 inside it.
How much does a revive pay in Wardogs?
In pre-launch testing, a standard revive paid $800, a resuscitator revive paid $900, and a defibrillator revive paid $1,200 outside the Hot Zone.
Inside the Hot Zone, those amounts doubled.
Payouts have shifted between builds, so these figures should be treated as approximate.
Is Medic or Pilot better for making money?
Medic ranked first and Pilot second in early-game testing.
Medic earns more reliably but needs a large group nearby.
Pilot works better when the team has few flyers, and it pays without fighting.
Can you make money in Wardogs without killing anyone?
Yes.
Reviving, healing, spotting, building, and transporting teammates all pay cash.
Zone presence pays too, so earning in the Hot Zone without firing a shot is possible.
Is a FOB worth building in Wardogs?
A FOB is worth it with spotters for the mortars, someone supplying ammo, and helicopters to shoot down.
It now costs about $9,900 with a Large Hammer, so treat it as a squad decision.
Build inside the zone, away from the towers but within mortar range of them.
Are tanks worth it in Wardogs?
Tanks earn a lot, with $270,000 or more per match in testing, but they are not an early-game option.
The Heavy Tank now needs Driver level 35, and the Artillery Tank needs Career level 90 and a $500,000 unlock.
A second player to drive or man the gun is also required.
How do you make money in Wardogs solo?
Recon spotting is the strongest solo option because it needs no squad.
A basic recon kit cost under $10,000 in testing, and cash comes in when marked targets die, no matter who kills them.
Piloting supply runs works alone too.
What should a cheap Wardogs loadout include?
For driving, testing used a repair tool, level 1 armor and helmet, a shotgun or SMG with a stack of ammo, bandages, and the free resuscitator.
Pilots can go even lighter with just a parachute and repair tool.
Cheap kits protect the bankroll when a vehicle gets destroyed.